Showing posts with label Apple TV. Show all posts

Sunday, November 29, 2009

Apple TV Potpourri

It's been a while since I said much about my (count 'em, two) Apple TV units. About time I rectified that ...

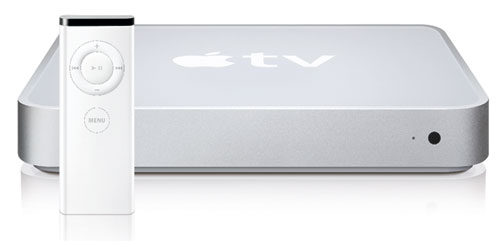
In case you missed it — admittedly, an easy thing to do — Apple's Steve Jobs unveiled the Apple TV in Sept. 2006 as a sort of home theater-connected iPod on steroids. You were expected to connect the petite box, less than eight inches square, to a TV or home theater system. Then iTunes on your computer would sync songs, videos, podcasts, photos, and other digital content to it's hard drive, just as with an iPod or iPhone. You could then play that content through your home entertainment system and/or HDTV.

Apple shipped the first Apple TVs in March 2007 — to deafening silence, aside from the technorati, most of whom held their collective noses. Sales were abysmal. I won't detail all the complaints of that time, but the main issue was that Apple TV didn't do enough, and it did what it did slowly, unreliably, and generally badly.

Over the last 2 1/2 years, Apple has slowly addressed the gripes (most of them). Apple TV is now a pretty good product, and in the fourth quarter of 2008, as the economy was tanking, sales were actually triple those of the fourth quarter of 2007.

The Apple Store's Apple TV page currently shows the product at $229.00 with a 160-GB internal hard drive, the original 40-GB model having been retired. (The fact that the internal drive is so small by today's standards is less of an issue than you might think, because Apple TV easily streams iTunes content that doesn't reside on it.)

In 2007 Mr. Jobs famously (?) spoke of the Apple TV as a "hobby" of the folks at Apple, Inc., not a full-fledged business. The Mac, the iPhone/iPod, the iTunes Store — they're real businesses, Jobs said. Apple TV was something of a household pet in Cupertino. He of course was right about that.

That may change — not real soon, but in the not too distant future. This blogger thinks it will and hopes it does. The key will be that Apple TV is now seen by Apple more as an all-purpose media client, and less as an iPod on steroids.

This paragraph from the Wikipedia article on Apple TV gets at what I mean:

With the "Take Two" software update announced by Steve Jobs at Macworld 2008, Apple TV became capable of acting as a pure stand-alone device, no longer requiring a computer running iTunes on Mac OS X or Windows to stream or sync content to it. Jobs stated, "Apple TV was designed to be an accessory for iTunes and your computer. It was not what people wanted. We learned what people wanted was movies, movies, movies." Users can access the iTunes store directly through Apple TV to purchase movies, music, music videos, and television shows. Customers can also use Apple TV to rent standard or HD-quality movies. Until mid-March 2009, iTunes HD movies could only be purchased from Apple TV.


If your computer goes down, or if iTunes is not running, the only thing you lose is the ability to stream — not sync, but stream — content from it to Apple TV. You can still play your previously synced video, audio, and photo content (as long as it resides on Apple TV's hard drive; if not, Apple TV does want to stream it from iTunes instead). You can still grab content, including HD movies and TV shows, from the iTunes Store directly. You can still play YouTube videos and listen to Internet radio stations (this last being a welcome new feature).

OK, so Apple TV has become a real product, in my eyes at least. Herein, a potpourri of cool stuff about it:

First, there is now a neat iPhone/iPod Touch app called (naturally) Remote (web page here; App Store download link here) that turns your mobile device's touch screen into a way to control an Apple TV. It's free, and it works. It presents the iPhone/iTouch user with an interface very much like the iPod app itself, with the addition of a Control tab that does what Apple TV's Apple Remote does, but more easily and intuitively.

The Control tab in effect turns your touch screen into an Apple TV remote control. You drag your finger along the touch screen, either side-to-side or up and down, to do what the Apple remote (-->) does with its control ring and central Play/Pause/Select button.

The Apple Remote's Menu button, meanwhile, is replaced by a virtual Menu button (<--) in the Remote App — I'll call the app RA for short. The RA > or Exit button brings up various tabs for exiting the Control Tab and accessing "Playlists," an "Artists" list, a "Search" function, and "More": Albums, Audiobooks, Composers, Genres, Movies, Music Videos, Podcasts, Songs, and TV Shows.

In the right-bottom corner is an Options button used to display on your TV Apple TV commands: basically, Start Genius, Add to On-The-Go, Browse Artist, Browse Album, and Cancel.

RA also controls iTunes playback. If (as I do) you have Airport Express units installed on your home network and connected to your home entertainment center(s), RA can tell iTunes to select among those and your computer's own speakers.

In fact, RA seems in some sense to be leveraging the ability of Apple TV to turn itself into an AirTunes device, à la an Airport Express. I don't fully understand what's going on ... but never mind. The important thing is that RA controls Apple TV (or iTunes itself) wirelessly, using WiFi. Unlike with the the infrared Apple Remote, you don't have to be in the same room with Apple TV or a computer running iTunes. That's marvelous. I like to start music playing and wander (with my iPhone) into a different room. RA can direct operations truly remotely, even to the extent of letting me turn up or down the volume when need be, from anywhere in your house.

Another cool thing: RA displays, on the iPhone/iTouch's screen, the cover art of the music you're playing on Apple TV! Cover art also appears next to songs, albums, etc., as you flip through them in RA, looking for something to play.

Here is the take Christopher Breen of Macworld had on RA. (I'm not precisely sure what "Oooh" and "Feh" mean in his lexicon, BTW ... )

* * *


The next item in my Apple TV potpourri is about a neat website, Apple TV Junkie. ATVJ covers Apple TV in depth. I especially like its The More You Know page, where you can learn about such things as:


Check it out!

Wednesday, September 17, 2008

HD TV Shows at iTunes Store

With the recent release of iTunes 8.0, Steve Jobs and company at Apple has also made available, for customers at Apple's iTunes Store, TV shows in high-definition for the first time.

HD episodes of Ugly Betty, Desperate Housewives, The Office, 30 Rock, Monk, Lost, and many other hit series can be purchased for $2.99, $1.00 more than the standard-def versions.

When you click on a "Buy Episode" button in iTunes, if the episode is HD, what you are supposed to be buying and downloading is actually two versions of the show, one HD and the other SD.

I find that there is a bug in Apple's implementation, however. If you use a Shopping Cart at the iTunes Store, rather than 1-Click Shopping, you can't get the HD shows. In my tests, you only get the SD version placed in your cart, not the HD. Then when you click on "Buy Now," the SD version only is downloaded.

Other people have reported online that they don't even get the SD version, just an indication that the show is mysteriously "unavailable."

The solution is to go into iTunes Preferences, under "Store," and click "Buy and download using 1-Click." That deselects "Buy using a Shopping Cart." (Make sure you have emptied your cart before doing this.) Now when you click a "Buy Episode" button, you will get an iTunes dialog asking you to confirm your purchase (unless you have previously told iTunes to disable this message). Once you authorize the purchase, the download will begin immediately of the two versions of the show.

iTunes 8.0 will then have both versions in its library. You can play either one, either in iTunes 8.0 or in QuickTime Player 7.5.5 (which, if you don't already have it, you need to get).

The HD version of the first episode of Monk, Season 7, "Mr. Monk Buys a House," is currently a freebie. It plays with a resolution of 1280 x 720 pixels with a total bit rate of 4541 kbps. (QT Player shows the data rate as being a bit lower: 4107.45 kbits/s.) This is true 720p resolution.

QT Player's numbers for the SD version are 853 x 480 non-square pixels in a 720 x 480 frame, at 1624.86 kbits/s. The SD file for this close-to-one-hour show takes up 509.8 MB, while the HD version uses 1.37 GB — nearly three times the storage.

The HD version plays just fine on my Apple TV, either when synced or streamed, with full resolution that is visibly better than that of the SD version.

Despite what I seem to have read online, it does not appear that iTunes 8.0 is smart enough, if you inadvertently try to sync an HD show to your iPod Touch, to substitute the SD equivalent. Instead, you have to manually arrange to sync the SD version. (I sync TV Shows using a selected playlist; syncing TV Shows by show rather that playlist, however, does not get around this problem.)

This shortfall, though minor, points up the inherent problem with the way Apple is implementing HD. It looks to me as if the only reason to bundle an SD version with an HD show is for the benefit of the iPod. (Maybe some older Macs than my MacBook Pro running Mac OS X 10.5.4 will, like an iPod, refuse to play HD, but I don't know this for a fact.)

If the iPod Touch (or iPhone) could just be updated so that it would play HD versions, downrezzing them as necessary for the coarser screen, Apple could omit the SD version entirely — saving about 20 percent on download time and storage requirements, plus obviating the iTunes Store bug that causes problems when using the Shopping Cart.

Coming alongside the iTunes and QuickTime upgrades was an upgrade (version 2.1) to my iPod Touch software. As part of the upgrade, there was a concurrent upgrade to the iPod's firmware. I wasn't aware that iPods have upgradeable firmware, but since they do, I have to wonder whether they could be made compatible with HD video.

HD video as implemented at the iTunes Store has higher bitrates than the iPod can nominally keep up with, and probably uses B-frames ("bidirectional video frames") to slim down storage requirements. But if the iPod's bitrate limit and allergy to B-frames could be overcome, voila: (albeit downrezzed) HD video!

I can pretty much guarantee that future iPods/iPhones will have it. Is there any hope for current 'Pods?

Thursday, August 28, 2008

Hooking iPod Touch to an HDTV

Apple's iPod Touch is sort of a jack-of-all-trades. Not only will it play music and videos for your eyes (and ears) only, in the standard video iPod way. It will also connect to your HDTV and play media for all to see and hear.

The secret to this is to get either an Apple Composite AV Cable ($49) ...


... or an Apple Component AV Cable ($49).


They both come with not only a means to connect your iPod Touch to a TV, but also a USB power adapter to hook it to electrical power. (This, along with virtually everything else I say in this post, applies equally to an iPhone as to an iPod Touch, by the way.) You just connect either version of AV cable to the 30-pin dock connector on the iPod's bottom edge, plug the AV cable's video and audio connectors into an appropriate input on your TV, and plug the USB connector on the AV cable into the USB adapter, which plugs into a wall outlet.

The audio connectors on both AV cables are the same: the typical red and white stereo audio RCA plugs. They go into, respectively, a pair of right and left audio-in RCA jacks on your TV.

The video connectors differ with the type of AV cable you get. If you get an Apple Composite AV Cable (which is what I have) you plug a single yellow-identified "composite" video RCA plug into a like jack on the TV. If you get the Apple Component AV Cable, you insert RCA plugs coded red, green, and blue into the appropriate "component" or "YPbPr" video inputs on your TV.

I recommend also getting the Apple Universal Dock ($49) to go with your setup. It lets you hook the 30-pin connector on the AV cable to it permanently. Then when you want to use the iPod Touch with the TV, you just stick the iPod in the dock, turn on the TV, and make sure the TV is set to use the correct input for the iPod.

The dock even comes with an Apple Remote that you can use from your easy chair to pause playback, skip to the next song or chapter, etc.


A very nice thing about using the iPod-to-TV connection to play videos, which is its main purpose, is that it does a pretty darn good job of it.

True, the resolution is only 480i. This is not high-definition video. An Apple TV can give you up to 1280 x 720 pixels of resolution, progressively scanned at 24 frames per second. Not so, the iPod Touch. A video file with that kind of HD resolution won't play on an iPod, period. Files that play on an iPod will have lower resolution in both the horizontal direction (the first number) and the vertical direction (the second number).

The second number (vertical resolution) will typically be 480 pixels, at most. For widescreen movies that play with black letterboxing bars at the top and bottom of the screen, this number is reduced appropriately.

The first number (horizontal resolution) can be at most 720 pixels, I believe. (Actually, though, because some videos are "anamorphically encoded," somewhat more than 720 pixels can be horizontally squeezed into the width of a nominally 720 x 480 video frame.)

The TV playback from an iPod touch iPhone will use "interlaced" fields, not "progressively scanned" frames, according to a footnote in this informative support document from Apple. Thus, it is 480i, not 480p, video playback that you will see on your HDTV screen.

Your HDTV will, however, "deinterlace" this 480i signal to give you a seemingly "progressive" viewing experience, ideally with no visible "scan lines" or jagged, vibrating edges on objects. How close to this ideal your experience will be depends in part on how well your HDTV does deinterlacing and in part on how "clean" your source video is, in terms of its encoding.


A nice thing about video playback on an HDTV from an iPod touch, at least in my opinion, is that the proper picture geometry is always preserved. For example, if the original video uses the old-style 4:3 aspect ratio, that's what you'll see on the TV screen. The 4:3 video frame will be "pillarboxed": flanked by thick vertical black bars on a 16:9 HDTV. (For this to be so, you'll need to make sure that "Widescreen" is selected under Video Preferences on the iPod.)

Or, if the original video has an aspect ratio greater than the HDTV's nominal 16:9, the iPod Touch will give you black letterboxing bars at the top and bottom of the screen.

Of course, if the original video has exactly 16:9 as its aspect ratio, you'll see neither letterboxing bars nor pillarboxing bars, and every pixel on the HDTV screen will be lit.

There are many people, though, who disagree with me on this — they want to see every HDTV screen pixel lit, no matter what the aspect ratio of the original video is. If the original ratio is not 16:9, they would like the image to be stretched either vertically or horizontally, as needed, to fill the screen. That this produces incorrect picture geometry — people who are too tall and skinny, or too short and fat — doesn't bother this type of viewer.

Since the iPod Touch introduces black bars whenever needed to preserve correct picture geometry, this type of viewer might not be happy.


The iPod Touch/TV combination has a few drawbacks, too. One is that you have to summon up the video, music album, playlist, etc. that you want to play from the touchscreen of the iPod itself, which at the time already has to be connected to the 30-pin connector of the AV cable (or to the dock). There is no way, even using the Apple Remote, to select items to play back from the TV screen itself. Plus, if you remove the iPod from the dock to locate your media files and initiate play, when you put it back in the dock, you'll just have to start things all over again.

Another drawback is that when you're playing music, you don't see the title, album art, etc. on the TV screen, as you would if you were using an Apple TV ... just a black screen.

The iPod-to-TV connection is not nearly as sophisticated as an Apple TV. The contents of the iPod screen are not sent to the TV, ever. That means you can't use the TV screen as an enlargement of the iPod screen, nor (as already mentioned) can you use the buttons on the remote to navigate to buttons and hotlinks on the iPod and select stuff. The remote won't do anything at all until you're actually playing something.

When you do play something, you will see its album art and identifying and control information on the iPod screen ... a nice touch, but it's not a lot of use to you from a distant easy chair.


Apple needs to rethink the user interface for the iPod-to-TV connection bigtime, in my humble opinion. My first inclination is to think that there's no reason why Apple shouldn't make the iPod Touch do everything an Apple TV does.

The Apple TV syncs automatically and wirelessly to your iTunes library. To sync the iPod Touch you have to connect it to the Mac running iTunes — even though the iPod Touch does connect wirelessly to your home network.

The Apple TV wirelessly streams video and music from iTunes — multiple iTunes libraries, not just the one used for syncing. To do the same with iPod Touch, you have to get geeky: see iPhone Remote Software Streams Media to iPhone/iPod!. Even then, the user interface that you have to put up with is worse-than-primitive by Apple TV standards. For example, when you are streaming a video into your HDTV via an iPod Touch, the chapter-advance function on the Apple Remote doesn't work. Instead of zipping to the start of the next chapter, it terminates the QuickTime playback of the video. Not wonderful.

The Apple TV does YouTube. So does the iPod Touch — but not using its iPod-to-HDTV interface.


The list goes on of things an Apple TV does that an iPod Touch, hooked to an HDTV, ought to emulate. When you think about it, there are only a few things an Apple TV can do that Steve Jobs and Company can be forgiven for not putting in the iPod Touch.

The Apple TV has a 40 GB or 160 GB hard drive to store synced material, while the iPod Touch uses a lesser amount of flash memory, 8 GB, 16 GB, or 32 GB. Clearly, you won't be able to sync as much stuff with an iPod Touch as with Apple TV.

The iPod Touch has to limit the amount of power it consumes so as to provide reasonable battery life and not generate too much heat. I imagine the reason that it limits video resolutions and bitrates and won't support videos using space-saving "B-frames" (bidirectional frames) has to do with this understandable design constraint. This is why Apple TV can play certain videos that iPod Touch can't.

Still and all, once you have your video library converted for use with an iPod Touch (or iPhone), those same videos play back on an Apple TV with all the resolution and quality they are capable of providing, given their iPod-specific limitations. It would be nice if the iPod Touch could likewise output them at resolutions higher than 480i, at least when using the Apple Component AV Cable.

Now, it may be that the chipsets necessary to make that happen are just too big, or run too hot, or gobble up too much power, or add too much to the cost of the iPod Touch to be economically feasible. Even so, I would sure like to see such a hi-def output capability, via component video if not HDMI, built into a future iPod Touch.

Thursday, August 07, 2008

Videos for iPod Touch, Part 2

In Videos for iPod Touch, I talked about my sleek-looking new iPod Touch 8G:

No, I said, it's not an iPhone, but iPhones are wait-listed right now.

The iPod Touch shares with the iPhone the ability to sync with iTunes and play video movies and TV shows, music, podcasts, etc. But not all videos that iTunes (or my Apple TV) will play can go onto the iPod — even though the offending videos are nominally in the MPEG-4/h.264 format that the iPod expects. I expect other iPod owners have the same kinds of problem. This post is about ways around the problems.


There are actually two kinds of problem here:

  1. If a video has been encoded with a video bitrate of over 1500 kbps, the iPod won't sync to it or play it.
  2. The iPod can't sync to or play videos that have been encoded with B-frames, space saving representations of individual video frames that record differences between themselves and following frames (and from preceding frames, but that's not a problem).

The iPod simply doesn't have enough memory or processing power to cope with high-bitrate videos or with deriving current frames from following frames in the video stream.

One solution to either incompatibility problem is to re-rip the video from an original DVD. I use HandBrake to port videos from DVD to iTunes. HandBrake 0.9.2 (the current version) has several presets for iPod-compatible rips. The one which I use a slightly modified version of is "iPod High-Rez." Any of the iPod-related presets will work, in that they carefully avoid giving you B-frames and video bitrates in excess of 1500 kbps. (They also insert the mysterious "iPod atom," making the output compatible with pre-Touch video iPods.)

However, I recommend that you modify the preset, as I did, to turn on Anamorphic: Strict under Picture Settings. This allows your output file to use "anamorphic encoding" if the DVD itself does. For more on what that means, see below.


The second workaround for getting a non-iPod-playable video to play on an iPod is to do a conversion of an existing rip into a form that works with iPod.

The simplest way to do a conversion is to select the movie or TV show in iTunes and select "Convert Selection for iPod/iPhone" in the Advanced menu. iTunes will verify that the video is not already iPod-playable, and if not it will start to convert it to an iPod-usable format — a lengthy process. The output file automatically goes into ~/Music/iTunes/iTunes Music/Movies (or ~/Music/iTunes/iTunes Music/TV Shows). The file name is the same as that of the original file, modified as necessary to ensure uniqueness. The original file is left untouched.

Using iTunes to do the conversion has several drawbacks:

  • The process is super-slow. It takes iTunes much longer to convert a file than it would take HandBrake to re-rip it.
  • You can't direct the output to any folder or hard drive you want. You have to be content with iTunes' default folder.
  • You can't name the converted output file anything other than iTunes' automatic choice of file name.
  • You can't control parameters like the resolution in pixels of the video frame. In my admittedly limited experience, iTunes seemingly insists on giving the output video file a frame width of 640 pixels, with a corresponding pixel height designed to reproduce the original's aspect ratio.
The second way to do a conversion is to use QuickTime Player. That allows you more control over such things as the destination drive and folder, the output file name, the video resolution, and other useful parameters. But, like iTunes itself, QuickTime is slow, slow, slow.

I'm currently investigating a third alternative: using a third-party video converter.

I'm presently trying the $29 ImTOO iPod Video Converter for Mac:


ImTOO's website says it "can convert video and audio files such as AVI, MPEG, WMV, DivX, MP4, MOV, XviD, VOB (the video format used in DVD), MP3, AAC, AC3, etc., to iPod supported formats, including MP4, MOV, MP3, and M4A."

I have just begun to experiment with ImTOO, and I find it pretty much works as advertised. And it's fast ... as long as it isn't butting heads with a HandBrake DVD rip, in which case it slows down to a crawl in favor of HandBrake.

Still, I have found at least two of my HandBrake rips that ImTOO's conversion attempts stall out on. At least using the settings I have tried, ImTOO gets to a certain point in the conversion and then just sits there ... forever.

One drawback with ImTOO is that MPEG-4/h.264 conversions for iPod are automatically given the .mp4 file extension, which means they automatically open in QuickTime Player, when double-clicked in the Finder. The .m4v extension, allowing automatic opening in iTunes, would be better.

A second drawback with ImTOO is that if your original file was created by HandBrake with chapter stops/names, ImTOO won't carry them over to the converted file. Bummer.

Another ImTOO drawback, one that applies to other third-party converters I've tried as well, is pretty technical, so bear with me as I try to describe it. I'm going to present this somewhat technical discussion in blue, in case you want to skip it. I'll also indent it.

I have an existing rip of Harry Potter and the Prisoner of Azkaban that HandBrake made some time ago. Its video frame dimensions (per iTunes' Get Info Summary) are 853x360 pixels. This means that if I play the video in iTunes or in QuickTime Player, I'll see it in a frame that is 853 pixels wide by 360 pixels high. 853:360 corresponds to the aspect ratio of the Potter movie on DVD.

Yet if I play the video in QuickTime Player, the player's Inspector window says (under "Format") that the video frame is only 720x360! What accounts for the discrepancy between 853 and 720? And why is the default-size QuickTime viewer window actually 853 pixels wide, not 720?

The solution to this mystery is that the HandBrake output simply reproduces the 720 pixels that are physically present in each row of each video frame on the DVD. But HandBrake also detects that the widescreen DVD was "anamorphically encoded" — formatted especially for widescreen TVs — such that the DVD player stretches the 720 pixels provided per row into the space of 853 pixels, thereby widening the frame as it is being viewed.

Handbrake also detects that the nominal 480 rows of pixels in each video frame on the DVD is actually only 360 useful rows. The remaining rows at top and bottom of the screen are not even coded; they are played as black letterboxing bars. Since they're not coded on the DVD, they don't need explicit coding in HandBrake's output, either. So HandBrake outputs an MPEG-4/h.264 file that has video frames of 720x360 pixels. These 720x360-pixel frames are intended to be displayed as if each frame had 853x360 as its true dimensions.

(For a clear discussion of anamorphic encoding in general and how HandBrake deals with it, see "Guide to Anamorphic Encoding in HandBrake.")

In other words, the HandBrake output is anamorphically encoded, just like the input from the DVD. Anamorphic encoding simply means that (in this particular case) a 720x360 pixel grid is stretched at time of playback to fill an 853x360 frame.

Yet when ImTOO converts the anamorphically encoded HandBrake-ripped video, it doesn't retain the anamorphic encoding. Instead, when ImTOO is set up to use an output video size of 853x360, it internally expands the 720x360 pixels in each input frame to fit into an 853x360 box and then uses that box to derive a non-anamorphic 853x360 output file.

(Actually, the ImTOO conversion fails unless the output video size is trimmed by a single pixel to 852x360! Apparently the two numbers surrounding the "x" have to be even.)

I have found that the only way to keep the original aspect ratio and also retain all the input file's video detail is to enter iTunes' video dimensions for the input file into ImTOO's Video Size field in the "Advance" settings. In the example of Harry Potter and the Prisoner of Azkaban, that's 853x360 — trimmed to 852x360 — not the unstretched 720x360 shown in QuickTime's Inspector window. Setting the ImTOO video size to 852x360 seems to be the only way to preserve the aspect ratio of the original video frame, for this particular movie.

When ImTOO is set up to retain all the detail in the original video file and preserve the same aspect ratio, it uses more pixels in the video frame, hence contains more bits in the output file, than it really needs to. This is because ImTOO can't produce an anamorphically encoded output file even when the input file is anamorphic. So its output, in this example, has video frames whose dimensions in pixels are 852 horizontally by 360 vertically.

Unfortunately, all that careful manipulation of ImTOO's conversion parameters results in an output file from ImTOO that iTunes won't sync to the iPod Touch! The output file plays in iTunes, on Apple TV, and in QuickTime Player ... but won't work with the iTouch. My guess is that the 852x360 video frame contains too many pixels to be iPod-acceptable.

A workaround to that problem might be to use, say, 720x304 as the output frame size in ImTOO. 720:304 is basically the same aspect ratio as 852:360. When ImTOO uses a video size of 720x304 for this movie's conversion, the output file syncs to the iPod just fine.

Trouble is, there are now only 304 pixels of vertical resolution in the picture, not 360 pixels vertically. The difference is not noticeable on the iPod, whose screen resolution is only 480x320 anyway. But the video looks much softer on my Apple TV-fed HDTV.

Yet I have found that this strategy of reducing the vertical resolution to preserve the aspect ratio is what at least one other converter I've tried, TechSpansion's
VisualHub, does by default when converting videos for the iPod Touch. It is a sensible choice, given that VisualHub, like ImTOO, cannot retain anamorphic encoding.

In fact — please note this well — the only reason I have any objection at all to this conversion strategy used by ImTOO and VisualHub is that I prefer to end up with a single video file that has all the resolution of the original DVD and plays on Apple TV as well as on iPod.

Yet the only way I have found to do this is to use anamorphic encoding that is honored by iTunes, Apple TV, and iPod ... and none of the converters I've tried so far can do that. HandBrake alone seems to be able to produce anamorphically encoded output that works with all my software and all my devices. That is why I plan to re-rip all my existing iPod-incompatible DVD rips with HandBrake, rather than converting the existing rips with ImTOO or VisualHub.

Note: ImTOO has in its advanced options, in addition to the Video Size parameter, an Aspect parameter. If I set the former to 720x360 for the Potter movie and the latter to 2.37 (852 ÷ 360), I get output that mimics the input when played in QuickTime Player. That is, it shows as 720x360 under Format in the Inspector window, while actually playing as 852x360. Thus, it would seem to be anamorphically encoded. However, neither iTunes nor the iPod will play it at 852x360, only at 720x360, which gives the wrong aspect ratio and distorted image geometry. I have no idea why iTunes/iPod honor the anamorphic nature of the HandBrake-ripped file but not of the ImTOO-converted file.


OK, that's the end of the admittedly technical discussion about various iPod video converters' lack of support for "anamorphic encoding" that works in all my software and in all my devices. There is, however, an important lesson to be learned from that discussion, one that all iPod Touch owners need to hear. It is this: contrary to what you may have heard elsewhere, the iPod Touch (and presumably the iPhone) can play videos that have more pixels in the video frame than the nominal 480x320 screen resolution of the playback device, the iTouch or iPhone, can display!

iPod Touch videos can have more than 640 pixels in their video frame width, which I previously thought to be the maximum number of bits allowed! I don't know what the true upper limit is as yet, but it's at least 720 pixels of horizontal resolution! (There may also be an upper limit, at present unknown, on the product of the horizontal resolution in pixels and the vertical resolution in pixels.)

Of course, you'll see at best only 480x320 resolution on the iPod itself. But the same file can be played on, say, Apple TV with full resolution. Cool!

Monday, August 04, 2008

Videos for iPod Touch

My new iPod Touch 8G (for 8 gigabytes of storage) is a $299 marvel. Sleek-looking, too:

No, it's not an iPhone, but iPhones are wait-listed right now.

The iPod Touch shares with the similar iPhone the ability to sync with iTunes and play videos, music, podcasts, etc. The videos can be movies or TV shows downloaded from the iTunes store. Or they can be videos you yourself have created, including those you have ripped from your collection of DVDs (see earlier posts in my Ripping DVDs series for more on that).

I have an extensive library of movies (and TV shows) that I have ripped from DVDs, usually using HandBrake. They were converted by HandBrake from the MPEG-2 format used on DVDs into the MPEG-4/h.264 format, the increasingly common format used in Apple products: iTunes, Apple TV, and the iPhone and video iPods, including the iPod Touch.

Only problem is, some of my MPEG-4/h.264 videos which play fine in iTunes and on my Apple TV can't be copied to my iPod Touch. When I try to sync them, I get an error dialog such as this one:

Some of the videos in your iTunes library, including the video "Notorious", were not copied to the iPod "Eric's iPod Touch 8G" because they cannot be played on this iPod.


Expanding the dialog box reveals:

"Notorious" was not copied because the video format is not supported by the iPod "Eric's iPod Touch 8G".


I have learned that there are three usual suspects:

  1. The video file does not contain an "iPod atom."
  2. The video file was encoded with "B-frames."
  3. The video file has too high a video bitrate, over 1500 Kbps.

Of course, if any of the videos are not shown in iTunes' Get Info Summary panel as being of kind: (Protected, or not) MPEG-4 video file using video codec: H.264 with profile: Low Complexity, then that would be yet another problem entirely. Other formats/codecs/profiles are not iPod-playable.

Whether or not an MPEG-4 video file is "Protected" — copy protected, that is, per the iTunes Store's Digital Rights Management protocols — makes no actual difference to iPod playability. The files your get from the iTunes store will be protected, of course, but they'll work fine on an iPod Touch. The files you rip from DVDs will not be copy protected at all. But to also work fine on iPod Touch, a video file you make yourself must be MPEG-4/h.264/Low Complexity, and it must adhere to certain extra rules.

HandBrake knows about all these rules, and if you use one of HandBrake's built-in iPod presets — I recommend "iPod High-Rez" — you'll always get an output file that is iTouch-compatible.

But several of my "legacy" rips aren't iTouch-compatible, as it turns out. Some of them were ripped by an earlier version of HandBrake (the current version is 0.9.2) that didn't always make iPod-compatible output files. At that time, I had no idea about any restrictions on iPod compatibility, and didn't really care. I was primarily interested in getting the best possible results for my Apple TV. Now, I wish I had had more foresight.

Anyway, here is more about the three usual suspects:

1. What is the mysterious "iPod atom"? It is apparently nothing more than a sequence of bytes that starts with the four hexadecimal characters 'uuid' followed by the parameter '1200', also in hex. This goes into the so-called "MPEG-4 file container" as "metadata." It magically allows iTunes to sync the video to certain picky early video iPod models (but not the iPod Touch or iPhone, which ignores the "iPod atom").

For early video iPod owners: if a video file's only flaw is the lack of an iPod atom, I am given to understand that AtomicParsley can help. According to this discussion, one can download and install a certain special version of AtomicParsley and then use the following command line in Terminal to insert an iPod atom in any MPEG-4 video file:

AtomicParsley OUTPUT.mp4 --DeepScan --iPod-uuid 1200 --overWrite

where OUTPUT.mp4 represents the name of the video file. You need to change OUTPUT.mp4 to the name of the MPEG-4 file you wish to modify. It's best to copy the original file and work only with the copy. (I assume the extension .m4v, where applicable, works also.)

I tried this with the 0.9.0 version of AtomicParsley, which is the only one I could actually find on the Internet. It simply did not work at all as an inserter of iPod atoms. Then I read the discussion referenced above a bit more closely and learned that I really need a certain "subversion" of AtomicParsley that does support this procedure. Unfortunately, I could not locate that subversion.

However, I am also led to believe that the "iPod atom" is needed only for the so-called 5th-generation and 6th-generation video iPods, the ones with the truly tiny video screens, that came along prior to the iPod Touch and the iPhone. The iTouch and iPhone don't care about the presence or absence of the "iPod atom," one way or the other.

2. MPEG-4 videos can optionally use so-called "B-frames." When they do, no iPod model to date can play them.

B-frames are "bidirectional," in that they are streamlined video frames that represent only the video information that has changed in that particular frame, compared to a prior video frame or a following video frame. B-frames make for smaller MPEG-4 files, because the ability to key off a later frame, not just an earlier one, can result in there being far fewer bits in the file.

Forcing the MPEG decoder to scan ahead to look at following frames, though, is not supported for iPods. It requires too much memory and too much processing overhead. However, iTunes can do it; so can the Apple TV.

If you rip a DVD especially for Apple TV in HandBrake, HandBrake will use B-frames ... and the resulting output file won't play on an iPod, no matter what you do.

3. Every MPEG-4 file has a certain "total bitrate." If you look at iTunes' Get Info Summary for the file, you'll see both a bitrate (such as 159 kbps) and a total bitrate (such as 1657 kbps). The first is how many bits (or thousands of bits) per second are used for the audio. The latter is how many are used for the video and audio, together. If you subtract the former from the latter you'll get the video bitrate, in this case, 1498 kbps. It has to be 1500 or less to work on an iPod.

(Actually, I seem to have some files where the crucial figure is just a little over 1500 kbps, but the videos play OK on my iPod. I can't explain why this is.)


So those are the three "usual suspects" that can keep an otherwise good MPEG-4/h.264 video file from working on an iPod Touch or iPhone. The first doesn't actually affect the iPod Touch or iPhone, only earlier video iPod models.

The second and third affect all video iPods. If you have a file which uses either B-frames or too many bits per second for the video (or both) you'll need to do one of two things to get the movie, TV show, or whatever to work on an iPod. Neither choice is easy.

The first choice is to re-rip your video from scratch. It's the choice I recommend, where feasible, for reasons that will be made clear as I discuss the second choice in my follow-on post, Videos for iPod Touch, Part 2.

If you do elect to re-rip your video, you need to make sure you do it in such a way as to produce an iPod-playable output file. You need to include an iPod atom, assuming you are using an earlier-model video iPod (even if you aren't, including the iPod atom doesn't hurt anything). You need to make sure no B-frames are used in the output. And you must make sure the video bitrate is 1500 kbps or less.

If you are using HandBrake 0.9.2 to do the ripping, the easiest way to avoid going wrong is to use one of the included presets for the iPod or iPhone. These include:

  • iPhone / iPod Touch
  • iPod High-Rez
  • iPod Low-Rez

I find "iPod High-Rez" ideal for my purposes, as it automatically includes the iPod atom in case it's needed, spurns B-frames, and sets 1500 kbps as the maximum video bitrate.

I actually have created my own modified version of this preset, as I (owing to poor hearing) like to include English-language subtitles on all my rips. I strongly recommend that you modify the preset, as I did, to turn on Anamorphic: Strict under Picture Settings. This allows your output file to use "anamorphic encoding" if the DVD itself does. More on what that means can be found in Videos for iPod Touch, Part 2.


The second workaround for getting a non-iPod-playable video to play on your iPod is to use special software to do a conversion. I'll cover that option in Videos for iPod Touch, Part 2.

Monday, May 19, 2008

Using a Browser for TiVoToGo

This post is part of my TiVoToGo series on the ins and outs of moving TV recordings from a TiVo DVR to a Mac, for use eventually with iTunes, Front Row, and Apple TV. In previous posts I assumed the use of TiVo Desktop to copy recordings from the TiVo to the Mac. But there is an alternative. As long as you have the TiVo Desktop software installed, you can simply transfer recordings via your browser.

This is true whether you use a Mac browser or a Windows browser in Parallels Desktop for Mac.

I use Firefox as my main browser, but any browser will do. Just enter the URL https://<IP_address>/nowplaying/index.html. (Notice the "s" in https.)

The <IP_address> is that of your TiVo, which you can learn from TiVo Central -> Messages & Settings -> Settings -> Phone & Network on your TiVo. Mine is currently 10.0.1.4, though it changes from time to time. (Your TiVo has an IP address only if it's connected to a network. You need to network your TiVo if you want to use TiVoToGo.)

Next come the formalities. You may be presented by your browser with a warning about an unknown security certificate. Just click OK or Continue to go on. You will then be asked to enter a user name and password. The user name is tivo. The password is the media access key of your TiVo, a ten-digit number you can discover by navigating to TiVo Central -> Messages & Settings -> Account & System Information -> Media Access Key on your TiVo. You enter these and click the option to have the browser remember them for future use.

(Later on when you download files, you may have to enter the user name and password a second time. Do the same as before: enter user name tivo, type in your media access key as password, and tell the browser to remember this information for future use.)

Once you are done with the administrivia, you see something like:


All the shows recorded on your TiVo are presented, grouped by program title into folders as necessary. You can click to open a folder and see the shows within.

(If you don't see folders, you may be in classic view rather than groups view. Scroll to the bottom of the page and click on groups.)

For individual shows, in folders or otherwise, you can click on Download MPEG-PS to download the show to your computer as a .TiVo file.

When you do that, the browser will do whatever it usually does when you download something. Default behavior for Firefox is to create the downloaded file on the Desktop, but you can alter Firefox's Options/Preferences to always ask where to save a downloaded file. That's what I do, since I want to direct all TiVo downloads to a folder on my AirPort disk.

An AirPort disk is a USB 2.0 hard drive connected to an Apple AirPort Extreme Base Station ... a router, for all you non-Mac people. I like to use the browser method, rather than the official TiVo Desktop software, to copy recordings from my TiVo to my Mac, because I can't get the latter to direct downloads to my AirPort disk.

To find a show you want to download, you'll probably have to scroll down the Now Playing list:


When you click on Download MPEG-PS, then after you tell the browser where to put the downloaded file, you'll see:


It will take a fair amount of time for the download to complete. You won't see a time estimate, since the TiVo doesn't let the download process know how big the file is. You can bank on it taking upwards of an hour for an hour show on a wireless home network. These files are big.

Once the download is done, you'll be able to play the file in Toast Video Player under Mac OS X. You can also play it in Windows Media Player under Windows XP in Parallels ... maybe. I find that Windows Media Player balks, complaining about a missing codec, unless I upgrade TiVo Desktop to TiVo Desktop Plus. (This tells me the TiVo Desktop Plus package contains more than just the application itself.)

You can also convert the .TiVo file for use with iTunes, Front Row, and Apple TV ... the subject of Using VideoReDo on TiVo Files and Using VisualHub on TiVo Files.

Using VideoReDo TVSuite on a Mac

VideoReDo TVSuite is $74.99 software from VideoReDo that can edit MPEG-2 videos. That makes it an excellent choice for those like me who want to transfer TV recordings from their TiVo DVR to their Apple TV, cutting out commercials along the way.

Using TiVoToGo functionality found on all current TiVo models, you can transfer recordings of TV shows to your PC or to your Mac. VideoReDo demands a Windows PC. I have only Macs. I get around that problem by running Windows in the $79.99 Parallels Desktop for Mac package.

Parallels basically lets me set up, on my Intel-based MacBook Pro laptop, a "virtual machine," complete with imaginary hardware devices such as network adapters and hard drives. Into that virtual machine I install Windows XP. Windows shows up as (you guessed it) the contents of an ordinary Mac OS X window:


If you like, you can also run Windows/Parallels in full-screen mode, hiding all Mac-like things entirely. Or you can run it in "Coherence" mode, such that each open window in Windows becomes a separate open Window in the ordinary Mac environment.

You can learn more about running Windows in Parallels in Using Parallels Desktop for TiVo-to-Apple-TV Transfers.

After I bring up Windows in Parallels, I then copy one or more TiVo recordings from my TiVo box to my virtual Windows computer via TiVoToGo — specifically, by use of the free TiVo Desktop software I downloaded from here and installed in Windows:


I actually sprang for the $24.95 TiVo Desktop Plus upgrade, available here, an enhanced version of TiVo Desktop. I did this for two reasons.

One,
Plus allows TiVo Desktop to export .TiVo files directly in an h.264 codec suitable for an iPod, without resorting to third-party software. This "one-stop shopping" approach I found to be of sadly limited use for Apple TV, though, since output resolution is restricted to 320 x 240 pixels, and since no provision is made for editing the programs.

Two, the Plus upgrade allows .TiVo files to play in Windows Media Player in Windows XP, which I find to be nice but not essential.

Yes, I probably could have saved my $24.95.

You can learn more about this TiVo Desktop software in Using TiVo Desktop in Windows.

Alternatively, you can use a Web browser to copy TiVo recordings without using the TiVo Desktop application (though you do need to have TiVo Desktop or TiVo Desktop Plus installed). See Using a Browser for TiVoToGo for more about that.

Once one or more TiVo recordings have been copied to the Windows virtual machine, I theoretically might need to decrypt them, since they arrive on the Windows VM in encrypted form. However — and this differs from my experience with TiVo Desktop on the Mac — I don't actually seem to have to perform a separate decryption step, before VideoReDo (see below) can use the files. I'm not sure exactly why this is, but it's a definite speedup.


The next thing I do, after transferring one or more TiVo files to my virtual Windows machine, is open one of them for editing in VideoReDo:


Once I am done with the editing process per se, I tell VideoReDo to save my (edited) result in an .mpg container file, the internal contents of which are officially considered an "MPEG-2 program stream." The .TiVo input file itself is in a similar MPEG-2 internal format, except that it's encrypted. So when I save the edited video to an .mpg file, basically all VideoReDo does is a "fast frame copy" of all the video and audio frames in the input file (minus, of course, the stuff I've edited out). This happens fairly rapidly, with no transcoding and accordingly no loss of quality.

I find it convenient to save to an AirPort disk the rather large .mpg files created by VideoReDo. Windows (into which I have installed the free download AirPort for Windows software) lets me access the 500 GB USB 2.0 hard drive I have attached to my AirPort Extreme base station (that's Apple's fancy name for a WiFi router).

The next step (see below) is to use the .mpg files I store on the AirPort disk as input to Mac software, VisualHub, which will convert them for Apple TV use. VisualHub, like all Mac software, can also utilize the AirPort disk.

You can learn more about the VideoReDo editing/exporting process in Using VideoReDo on TiVo Files.


I need to convert the edited .mpg videos from the MPEG-2 format in which they are recorded by VideoReDo to a format playable by Apple TV.

Specifically, I need to convert them to the h.264 version of the MPEG-4 codec. h.264 is a compact, high-quality way to encode video programs, much more space-efficient at any given level of video quality than MPEG-2. Not only does Apple TV use h.264, so do video iPods and iPhones.

I find the software of choice to do the MPEG-2 to h.264 transcoding is VisualHub, which sells for $23.32:


The basic idea is that you drag the .mpg file you want to convert into the VisualHub window, choose To: iTunes, and select Optimize for: Apple TV with H.264 Encoding checkmarked. Use the Edit... button to tell VisualHub where to put your output file. Then click Start (replaced by Cancel in the screen shot above) to initiate the conversion.

If you want to get more control over the details of the conversion, then before you click Start, click Advanced... and see the Advanced Settings pane:


In this particular example, I forced FFmpeg Decoding (rather than QuickTime Decoding or VLC Decoding). Since I have managed to gain some familiarity with FFmpeg as a transcoding engine (see Transcoding to h.264 Using FFmpeg), that seemed reasonable.

I also forced the size-in-pixels of the video frame to 960x540, and the video framerate to 30 frames per second. The input was actually 1280x720 — 720p high-definition TV — at 60 fps. Apple TV can't handle that frame size/rate combination, so I lowered both the size and the rate to the top numbers Apple TV will tolerate.

You can learn more about using VisualHub to create Apple TV-compatible videos out of TiVo recordings in Using VisualHub on TiVo Files.


The "bucket brigade" of TiVo Desktop Plus and VideoReDo TVSuite in Windows (running in Parallels Desktop for Mac), followed by VisualHub on the Mac side, seems to be a winner for me.

TiVo Desktop Plus grabs my recordings and copies them to my computer.

VideoReDo TVSuite edits out the commercials and unwanted material. It also can work magic with input files that are in need of some kind of repair, such as making sure the audio and video are properly in sync. For especially damaged files, its Quick Stream Fix option can save the day.

VisualHub is a versatile engine for converting between (among other combinations) the original file's MPEG-2 video codec and the MPEG-4/h.264 codec required by Apple TV.

What's not to like?

Using VisualHub on TiVo Files

In this TiVoToGo series of posts I've been talking about ways to usher recorded TV shows from your TiVo DVR to your Mac and then play them on your Apple TV.

One good way involves using a software "bucket brigade":

  1. TiVo Desktop to copy recordings from the TiVo to the Mac — see Using TiVo Desktop in Windows.
  2. VideoReDo TVSuite to edit out commercials, and also decrypt the original file — see Using VideoReDo TVSuite on a Mac.
  3. VisualHub to convert the decrypted-and-edited file to a format compatible with Apple TV. (Edit: Unfortunately, since this post originally appeared, Techspansion, the creator of VisualHub, has closed its doors.)

The first two run in Windows XP, which runs in Parallels Desktop for Mac — see Using Parallels Desktop for TiVo-to-Apple-TV Transfers. The third, VisualHub, is the topic of this post. It runs under Mac OS X.

VisualHub (whose logo appears to the right) is "the universal video converter for Macintosh," which means it can convert virtually any video file (with or without audio) into any of several formats. One of the input formats VisualHub can convert is MPEG-2, signified by an .mpg filename extension. (VisualHub cannot read an encrypted MPEG-2 file with a .TiVo extension, such as one created by TiVo Desktop. This is one reason why I use VideoReDo, which reads in a .TiVo file and exports an .mpg.)

VisualHub in turn reads in an .mpg file and converts it to an .mp4 file — an extension signifying MPEG-4 as opposed to MPEG-2. MPEG-4 encoding is more space- and bitrate-efficient than the MPEG-2 format used on DVDs.

Yet more efficient is the h.264 version of MPEG-4, which is what VisualHub produces when told (1) to export to iTunes ... (2) a file optimized for Apple TV ... (3) using h.264 encoding:


Setting up the VisualHub conversion illustrated above was simple. I simply dragged an .mpg file icon to the VisualHub icon in the Dock. (I could also have dragged it into the VisualHub main window shown above, after manually having opened the VisualHub application.)

I then clicked on the iTunes tab at the left end of the To: row. I checkmarked H.264 Encoding. I used the pop-up menu to select optimizing for Apple TV ... instead of, say, iPod Touch or iPod Nano.

One thing that did was make sure my output file uses "B frames," handy ways of encoding individual video frames or pictures. B frames hold the output file size and bitrate down. If B frames aren't used, the output consists of just I frames and P frames, which use more bits than B frames. However, since B frames impose a heavy load on the decoder of the file, iPods don't support them. Apple TVs do.

I didn't have to move the Quality slider to Standard, because that was the default position. The different slider positions make for different levels of video quality in the output file by increasing or decreasing the video bitrate (and consequently the file size). I find that standard quality is fine for TiVo standard definition files, resulting in video that plays without artifacts. The file size is, meanwhile, quite compact.

I clicked on the Edit... button to tell VisualHub where to put the output file. By default, VisualHub puts the output file in the same folder as the input file. If you want it to go in a different place, use the Edit... button. (One thing lacking in VisualHub is the ability to give the output file any name you like. Instead, the output file always has the same name as the input file, with a different extension.)

I checkmarked Add to iTunes since I wanted my output file to play through iTunes on an Apple TV. The Add to iTunes option avoids having to add the output file manually.

Finally, I clicked on the Start button (which was replaced by the Cancel button seen in the screen shot above). VisualHub began the conversion of the input file to the output file, a process which lasted over two hours. The result was a file playable by iTunes and likewise by Front Row and Apple TV.

You can gain additional control over how the output file is rendered by using the VisualHub Advanced Options window. More on that in Using VisualHub Advanced Options.

Using VisualHub Advanced Options

This is another post in my TiVoToGo series on the ins and outs of moving TV recordings from a TiVo DVR to a Mac, for use eventually with iTunes, Front Row, and Apple TV.

One good way to do it involves this software "bucket brigade":

  1. TiVo Desktop to copy recordings from the TiVo to the Mac — see Using TiVo Desktop in Windows. (You can also do this with a Web browser — see Using a Browser for TiVoToGo.)
  2. VideoReDo TVSuite to edit out commercials, and also decrypt the copied file — see Using VideoReDo TVSuite on a Mac.
  3. VisualHub to convert the decrypted-and-edited file to a format compatible with Apple TV.

The first two run in Windows XP, which runs in Parallels Desktop for Mac — see Using Parallels Desktop for TiVo-to-Apple-TV Transfers. The third, VisualHub, is the topic of this post. It runs under Mac OS X.

In Using VisualHub on TiVo Files I discussed the basics of using VisualHub. In this post I'll deal with some of VisualHub's Advanced Settings.

The Advanced Settings window looks like this:


In the above screen shot I'm about to convert a file that I identified in the VisualHub Main Window:


This conversion is to be of a file in the MPEG-2 video compression format, as indicated by the .mpg extension. That input file is the result of copying a TiVo recording of an episode of House that was cablecast in 720p, the high-definition format in which there are 60 frames of video per second, each frame having a resolution of 1,280 x 720 pixels. After copying the recording using TiVo Desktop, I edited out commercials using VideoReDo. Now I have to convert it to a format compatible with Apple TV.

That format is the h.264 version of the MPEG-4 codec ... which is exactly what has been selected in VisualHub's Main Window. But there are restrictions that apply to files that are going to be playable by Apple TV, which is why I have to use Advanced Settings.

Apple TV files have certain combinations of resolutions and frame rates that need to be adhered to. It turns out that the top resolution for video with the 16:9 aspect ratio — the aspect ratio that is standard for HDTV — is 960 pixels by 540 pixels, at a maximum frame rate of 30 frames per second. Hence, in the Advanced Settings window above I indicate Size: 960 x 540 px and Framerate: 30.

I have also told VisualHub to Force: FFmpeg decoding. The input file will accordingly be decoded by FFmpeg, a decoding-encoding module included with VisualHub. I don't want to use the second choice in the Force: pop-up menu, Quicktime decoding, since for murky reasons QuickTime, even when enhanced with Apple's $19.99 QuickTime MPEG-2 Playback Component, will neither play nor decode most .mpg files derived from TiVo recordings.

Nor do I want to use the third, remaining choice in the Force: pop-up menu, VLC decoding. The main reason for that is ... well, actually, I just haven't tried that option.

If I don't put the check mark next to Force:, my experience is that VisualHub will default to FFmpeg decoding anyway. I put the check mark there just for illustrative purposes.


That's about it with respect to HDTV recordings. I also like to save old movies from the Turner Classic Movies channel, which is standard-def. Many of these are shown in a letterbox: the movie is shown in its original aspect ratio with black bars at the top and bottom of the screen.

When a letterboxed movie is converted by VisualHub and then shown on a widescreen TV via Apple TV, it will have black bars not only at the top and bottom, but at the sides as well:


You can use the cropping features of VisualHub to reduce or eliminate the black bars at the top and bottom. In so doing, you will also eliminate the bars at the side:


Here are the necessary Advanced Settings:


I set up the conversion to crop 104 pixels (actually, lines of pixels) off the top and 104 off the bottom of the nominally 640 x 480 input image, resulting in a 640 x 272 output image.

(To be quite precise, the actual frame size of the input image happens to be 704 x 480, not 640 x 480. 704 non-square pixels are shoehorned into each input line where 640 square pixels will appear in the output of the conversion. Since VisualHub cannot output non-square pixels, I'm ignoring this detail.)


How I determined exactly how many lines to crop at top and bottom was not at all straightforward, though. There are several ways to do this. One is to use the Set Autocrop: pop-up menu, selecting from it its By This File option.

When you do that, VisualHub examines the first few seconds of the input file to try to see how many lines of pixels at the top and bottom of the screen are all black. Those are presumably the letterboxing bars, and they can go away.

Trouble is, TiVo files generally have a line of pixels at or near the top of the screen in which the pixels are not all black. This line contains changing information that translates into Closed Captioning text. It fools VisualHub into using zero for the number of lines to autocrop at top.

VisualHub has a better chance of getting the bottom autocrop figure right. In my conversion of The Great Escape, it wanted the crop-at-bottom number to be 108 lines.

At first I thought I would just use the same number for crop-at-top. I recognized, however, that the results of the video compression VisualHub would be doing as it converted the MPEG-2 input to the MPEG-4/h.264 output would be better in quality if the number of horizontal lines in the resulting image were divisible by 16.

Doing a little back-of-the-envelope math, I saw that the crop-at-top and crop-at-bottom numbers should each be divisible by 8 — given that the number of lines in the input image, 480, is divisible by 16. 8 times 2 is 16. Hence, the crop-at-top and crop-at-bottom numbers can be divisible by 8 ... not necessarily by 16.

108 is not divisible by 8, while 104 is. Hence, I used 104 as both the crop-at-top and the crop-at-bottom number.

Another way to get the right cropping numbers is by trial and error ... in which case, you would be well advised to create a short snippet of the movie to run your experiments on. You can do that in VideoReDo as a separate step from outputting the entire movie. If you go the snippet route, your best bet is to output a swatch of, say, one minute in length from somewhere in the middle of the movie. Use that snippet for your cropping experiments.

(Why a snippet from the middle of the movie? Often, material at the very beginning gives a false bottom-autocrop reading. For instance, old MGM flicks typically start with a Leo the Lion logo on a black background. VisualHub interprets everything below the logo as croppable.)

Finally, a quick and dirty way to set the cropping numbers for any letterboxed film is to try 60 for both the top and the bottom figures. The result will be a 640 x 360 frame, for a 16:9 aspect ratio. That's the aspect ratio of a widescreen HDTV. There may still be (shorter) letterboxing bars on the HDTV screen, but even if you cropped off every single line of black in the input, by the time Apple TV got done displaying the output image on your HDTV, the (shorter) bars would show up there anyway.

Of course, 60 is not divisible by 8, so the purist may prefer to crop 56 pixels, or 64, at top and bottom and sacrifice the exact 16:9 aspect ratio. Or, try 56 at top and 64 at bottom.

One caveat: Not all letterbox bars are greater than, say, 60 pixels in height, and using a predetermined number such as 60 for quick-and-dirty frame cropping could bite into the actual image. One way to avoid that is to click VisualHub's Preview button in Advanced Settings. Up will pop a window giving you an advance look at a single frame from the video:


Once the Preview window is visible, you can change the number of seconds into the video the preview frame comes from by setting Start at ___ sec. That lets you find a still frame that is truly representative — if, say, early frames from the very beginning of the video aren't letterboxed.

With the Preview window visible, you can go back to the Advanced Settings window and tweak the cropping parameters. Then either click Preview again in the Advanced Settings window or click Generate in the Preview window. The still frame will be redisplayed with the new cropping. In that way you can zero in on just the cropping numbers you want.

(Another great thing about the Preview window is that you can check mark Show Compression, then change the Quality setting in the VisualHub main window and click Generate. The preview will be regenerated with the new compression parameter, and you can see immediately how your change will affect the output quality.)

Please pardon the above extended dissertation on image cropping, by the way. Cropping is helpful in making best use of your TV screen's real estate ... and it makes for smaller output files from VisualHub!


If you go back and look at the prior Advanced Settings screen shot, you can see that I also check-marked VisualHub's Deinterlace option. Understanding the value of this option, alas, demands another dissertation.

Standard-def TV is interlaced, which means every still frame in the moving image is actually two pictures. One picture occupies the odd-numbered lines of the 480 lines of pixels in the image; the second, which represents the scene 1/60 second later, occupies the even-numbered lines.

Normally, that creates no problems. There are simply 30 frames per second, each composed of two fields, for a field rate of 60 per second.

When the source of the program is film, though, there are problems. Film is shot at 24 frames per second, not video's 30 frames per second. When film is shown on television, the 24 frames can be sliced and diced into 48 fields easily enough ... but there need to be an additional 12 fields to pad out to 60 per second.

That is done simply be repeating some of the 48 fields. (TV is known for its repeats, right?)

For technical reasons, this trick is referred to as "3:2 pulldown," aka "2:3 pulldown."

When the resulting TV signal is captured by a TiVo and digitized, and then converted to MPEG-4/h.264, the conversion creates frames that are not interlaced. They do not consist of two pictures 1/60 second apart. They consist of a single picture per video frame which is the composite of the two fields of the original.

When two fields are composited in this way, they can produce an image that comes from two separate frames of film. Objects that are in motion can have their normally straight edges take on a serrated appearance:


Watching such serrated-edge images stream by can give the impression that the images are fuzzy or unstable.

The best antidote is to do "3:2 pulldown compensation": simply remove the 12 fields per second that were inserted to pad out to 60. The result, done right, is that each of the (now) 24 frames per second of video represents exactly one frame of the original film. No more serrated edges.

Sadly, VisualHub has no way of doing 3:2 pulldown compensation. Instead, it uses deinterlacing. In the type of deinterlacing VisualHub uses, one field of each frame is simply discarded ... or, actually, it has the other field of the same frame substituted for it.

Now, all the information in each frame of video output comes from just one film frame ... and there can be no serrated edges. The image looks rock steady:


The downside is that vertical resolution is halved. Where there were originally 480 lines of vertical resolution, now there are just 240. (And cropping the image at top and bottom can result in even fewer lines of vertical resolution.)

So the use of VisualHub's Deinterlace option is a matter of personal taste. I myself find that deinterlacing produces a more pleasing result than allowing edge serration to creep in. Your mileage may vary.